How to Self-Inspect and Repair a Malfunctioning Air Conditioner at Home: A Comprehensive Guide
Air conditioning is a modern luxury that we often take for granted until it malfunctions on a sweltering summer day. While professional HVAC technicians are just a call away, there are several troubleshooting steps you can take to diagnose and potentially fix minor issues with your air conditioner at home. Not only can this save you money, but it can also provide relief from the heat while you wait for professional assistance. In this guide, we’ll walk you through the steps to self-inspect and repair a malfunctioning air conditioner.
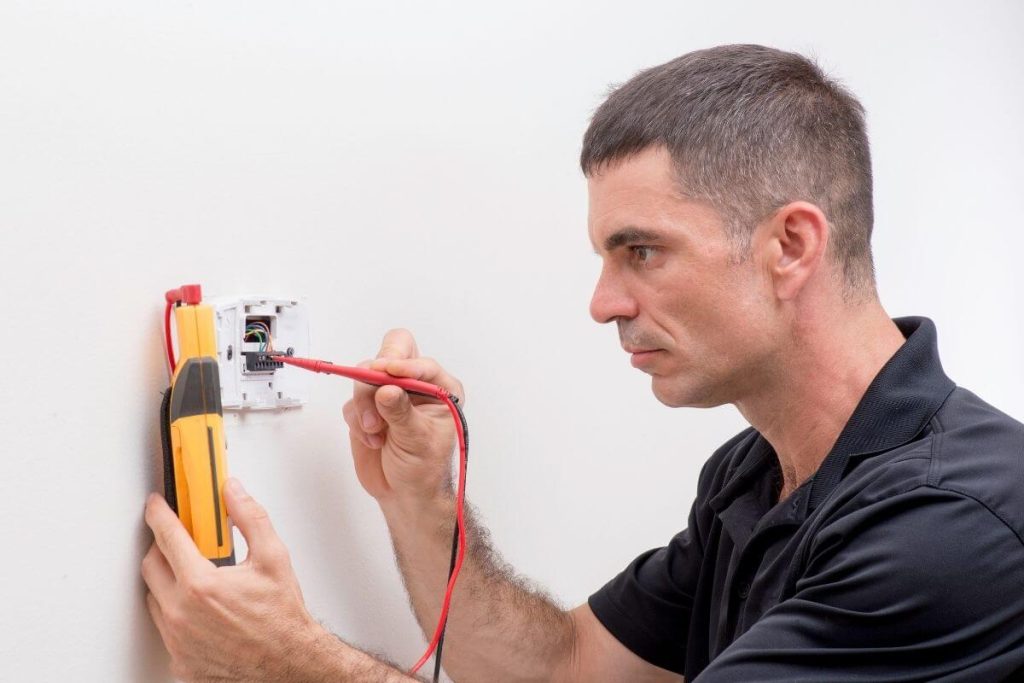
Check the Thermostat
One of the first steps in troubleshooting a malfunctioning air conditioner at home is to check the thermostat. The thermostat plays a crucial role in regulating your AC system’s temperature and operation. Here’s how to perform this essential check:
1. Verify the Thermostat Settings: Ensure that your thermostat is set to the desired temperature and mode, whether it’s cooling or heating. Sometimes, an accidental adjustment or mode change can result in discomfort.
2. Replace Thermostat Batteries: If your thermostat is battery-powered, low batteries can cause it to malfunction. Replace the batteries with fresh ones to rule out this common issue.
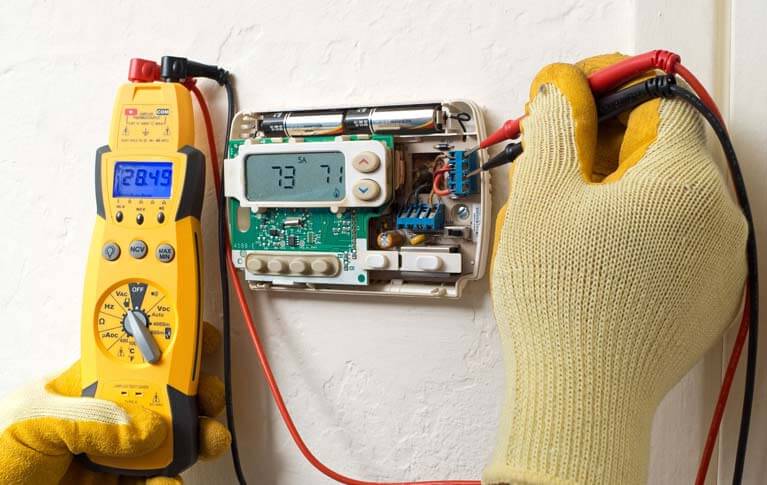
3. Clean the Thermostat: Dust and debris can accumulate around the thermostat’s sensors and affect its accuracy. Gently clean the thermostat with a soft brush or compressed air to remove any obstructions.
4. Check for Wiring Issues: Inspect the thermostat’s wiring for loose or damaged connections. Make sure all wires are securely attached to their terminals. If you notice any loose wires or frayed insulation, consult your thermostat’s manual for wiring diagrams and correct any issues.
5. Test the Thermostat: To verify that your thermostat is functioning correctly, set it to a temperature lower than the current room temperature (for cooling) or higher (for heating). You should hear a clicking sound as the thermostat calls for your AC unit or furnace to turn on. If you don’t hear this click, there may be a problem with the thermostat.
6. Calibrate the Thermostat: Some thermostats allow you to calibrate their temperature readings. If you find that your thermostat consistently displays inaccurate temperatures, consult the manual to calibrate it correctly.
7. Install a Programmable Thermostat: Consider upgrading to a programmable or smart thermostat. These devices offer advanced features like scheduling and remote control, which can enhance your AC’s efficiency and comfort.
By carefully checking your thermostat and addressing any issues you discover, you can often resolve minor AC problems and maintain a comfortable indoor environment. However, if your thermostat appears to be functioning correctly, and the issue persists, it’s advisable to explore other possible causes of AC malfunctions or seek professional assistance.
Remember that accurate thermostat settings are crucial for efficient cooling and heating. Regularly checking and maintaining your thermostat can contribute to your overall comfort and energy savings.
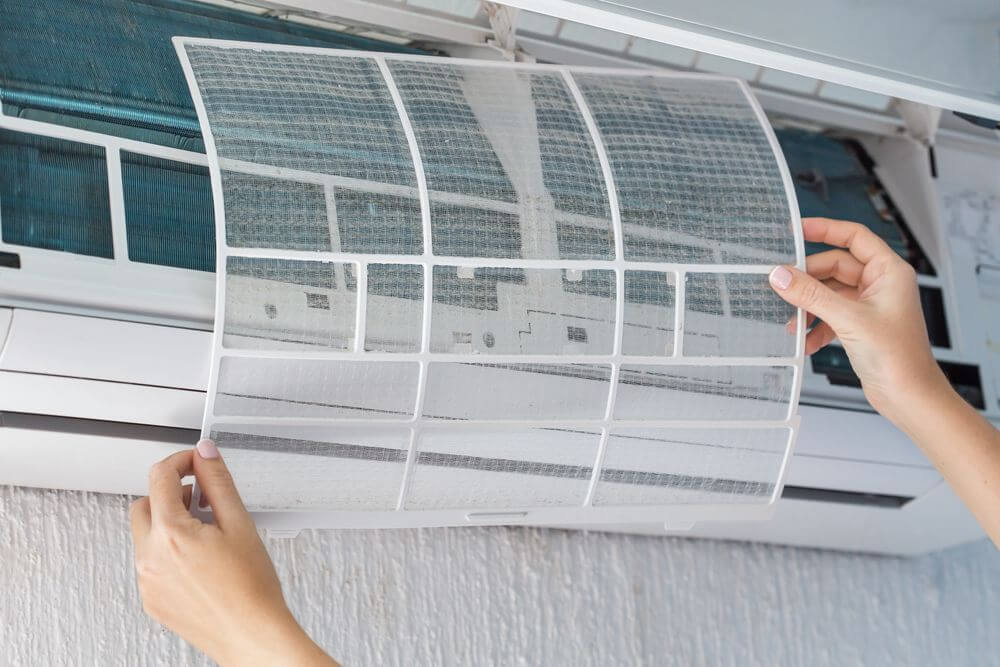
Inspect the Air Filter
Inspecting the air filter of your air conditioning system is a fundamental step in maintaining its efficiency and performance. A clogged or dirty air filter can restrict airflow, reduce cooling capacity, and strain the system. Here’s how to inspect and address your air filter:
1. Locate the Air Filter: The air filter is typically found in the return air duct, near the air handler or furnace. It may also be situated behind a grille in a wall or ceiling.
2. Turn Off the System: Before you begin, it’s essential to turn off your air conditioning system. This ensures your safety during the inspection and prevents dust and debris from circulating.
3. Remove the Air Filter: Carefully remove the air filter from its housing. Depending on your system, this may involve sliding it out of a slot or releasing latches.
4. Inspect the Filter: Hold the air filter up to the light and examine it. If you can’t see light passing through or if the filter appears visibly dirty and clogged with dust and debris, it’s time for maintenance.
5. Replace or Clean the Filter: Depending on the type of air filter your system uses, you have two options:
- Disposable Filters: If you have a disposable filter, replace it with a new one. Ensure you select the correct size and type recommended for your system.
- Reusable Filters: For reusable filters, wash it thoroughly with warm, soapy water. Allow it to dry completely before reinserting it into the housing.
6. Set a Regular Maintenance Schedule: To ensure optimal performance, establish a regular schedule for inspecting and changing or cleaning your air filter. It’s recommended to do this every 1 to 3 months, but check your system’s manual for specific guidance.
7. Consider Upgrading Your Filter: If you have allergies or want to improve indoor air quality, consider upgrading to a high-efficiency particulate air (HEPA) filter or an electrostatic filter. These options can capture smaller particles and allergens, providing cleaner air.
8. Reinstall the Filter: Once your filter is clean or replaced, securely reinstall it into the housing, following the manufacturer’s instructions. Ensure it fits snugly to prevent air bypass.
A clean and well-maintained air filter not only promotes better indoor air quality but also ensures that your air conditioning system operates efficiently. It can extend the lifespan of your system and reduce energy consumption, leading to potential cost savings.
Conclusion
Regularly inspecting and maintaining your air filter is a simple yet effective way to keep your air conditioner running smoothly. By following these steps and incorporating filter maintenance into your routine, you can enjoy improved indoor air quality and a more efficient cooling system.
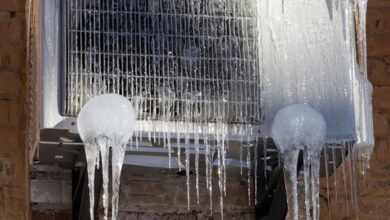
Clean the Condenser Coils
Cleaning the condenser coils of your air conditioning system is crucial for maintaining its efficiency and prolonging its lifespan. Over time, these coils can accumulate dirt, dust, and debris, hindering the heat transfer process. Here’s how to clean them effectively:
1. Turn Off the Power: Always turn off the power to your AC unit before starting any maintenance tasks. You can do this by switching off the circuit breaker or disconnecting the unit from its power source.
2. Access the Condenser Unit: Locate the outdoor condenser unit, which is typically positioned outside your home. It resembles a large metal box with fan blades on the top.
3. Remove Debris: Clear away any leaves, grass, or debris that may have accumulated around the unit. Ensure that there is at least two feet of clearance around the condenser to allow for proper airflow.
4. Clean the Coils: Use a hose to gently spray the condenser coils from top to bottom. Start by spraying water at a gentle pressure to remove surface dirt and debris. Avoid using a high-pressure hose, as this can damage the coils.
5. Apply a Coil Cleaner: For stubborn dirt or debris buildup, you can use a commercial coil cleaner. Follow the manufacturer’s instructions for application and wait for the recommended time before rinsing.
6. Rinse Thoroughly: After applying the cleaner, rinse the coils thoroughly with clean water. Ensure that all the cleaning solution is washed away.
7. Straighten Bent Fins: Inspect the aluminum fins on the coils. If you notice any bent or damaged fins, use a fin comb or a flat tool to carefully straighten them. This helps maintain proper airflow.
8. Reassemble and Power On: After cleaning and straightening, reassemble any parts you removed and turn the power back on.

Cleaning the condenser coils at least once a year can significantly enhance your air conditioner’s efficiency and cooling performance, allowing it to operate more effectively.
Clear the Condensate Drain
The condensate drain plays a crucial role in removing excess moisture produced during the cooling process. If this drain becomes clogged, it can lead to water leaks and reduced cooling efficiency. Here’s how to clear it:
1. Locate the Drain Line: Find the condensate drain line, typically located near the indoor air handler. It’s a PVC pipe that extends from the unit.
2. Turn Off the Power: As with any maintenance task, turn off the power to your AC unit to ensure safety.
3. Clear the Blockage: Insert a wet/dry vacuum cleaner’s hose into the drain line’s opening. Seal any gaps around the hose with a cloth or duct tape to create a tight seal.
4. Apply Suction: Turn on the vacuum cleaner to create suction within the drain line. This should help remove any blockages, such as algae or debris.
5. Flush with Water: Once you’ve cleared the blockage, pour a mixture of one part bleach and one part water into the drain line to prevent future algae growth. This also helps clean the line further.
6. Check for Proper Drainage: To ensure the drain line is clear, pour a small amount of water into the drain pan. It should flow freely through the drain line to the outside.
7. Reassemble and Power On: After completing the task, reassemble any components you removed and turn the power back on.
Clearing the condensate drain is a relatively simple task that can prevent water damage to your home and maintain your AC’s efficiency.
Inspect the Electrical Connections
Proper electrical connections are essential for the safe and efficient operation of your air conditioner. Regularly inspecting these connections can prevent electrical issues and system malfunctions:
1. Turn Off the Power: Always start by turning off the power to your AC unit at the circuit breaker or disconnect switch.
2. Access the Electrical Panel: Locate the electrical panel on the side of your outdoor condenser unit. It typically has a removable cover.
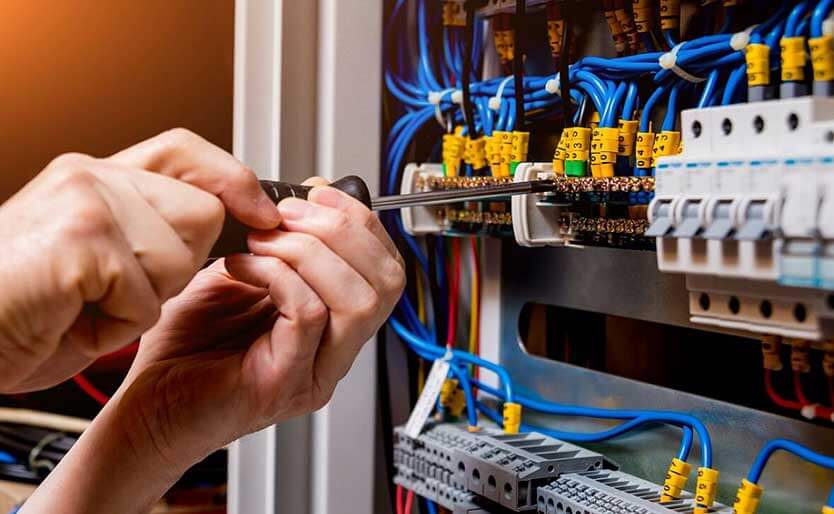
3. Inspect Wiring: Examine the wiring and connections inside the panel. Look for loose, frayed, or damaged wires. Pay close attention to the connections at the contactor and capacitor.
4. Tighten Loose Connections: If you find any loose connections, use a wrench or screwdriver to securely tighten them. Be cautious and gentle to avoid damaging the wires.
5. Replace Damaged Wiring: If you encounter damaged or frayed wires, replace them immediately. Use wires of the same gauge and type as the originals.
6. Check for Corrosion: Look for signs of corrosion or rust on the electrical components. If corrosion is present, clean it using a wire brush and apply a corrosion-resistant coating.
7. Verify Wiring Diagram: Consult your air conditioner’s wiring diagram, typically located inside the unit’s service panel. Ensure that the connections match the diagram.
8. Reassemble and Power On: After completing the inspection and any necessary repairs, reassemble the electrical panel and turn the power back on.
Regularly inspecting and maintaining electrical connections can prevent electrical failures, ensure safety, and prolong the life of your air conditioning system.
Check the Capacitor
The capacitor in your air conditioning system is responsible for starting the motors that drive the compressor and fan. A malfunctioning capacitor can lead to a non-starting AC unit. Here’s how to check it:
1. Turn Off the Power: Always turn off the power to your AC unit before inspecting or replacing the capacitor.
2. Locate the Capacitor: Capacitors are typically located in the outdoor condenser unit. There may be two capacitors—one for the fan motor and one for the compressor.
3. Discharge the Capacitor: To ensure safety, discharge the stored electrical energy from the capacitor by using a screwdriver with an insulated handle. Carefully touch the metal end of the screwdriver to both terminals of the capacitor.
4. Examine the Capacitor: Look for signs of damage, such as a bulging or leaking casing. If the capacitor appears swollen or has oily residue, it likely needs replacement.
5. Test the Capacitance: Use a multimeter with a capacitance setting to test the capacitance of the capacitor. Compare the reading to the manufacturer’s specifications. If it falls significantly below the specified range, the capacitor is faulty.
6. Replace the Capacitor: If the capacitor fails the test or shows signs of damage, replace it with a new one of the same capacitance rating.
7. Reassemble and Power On: After replacing the capacitor, reassemble any components you removed and turn the power back on.
A functioning capacitor is essential for starting the motors in your AC unit. Replacing a faulty capacitor can often resolve a non-starting AC system.
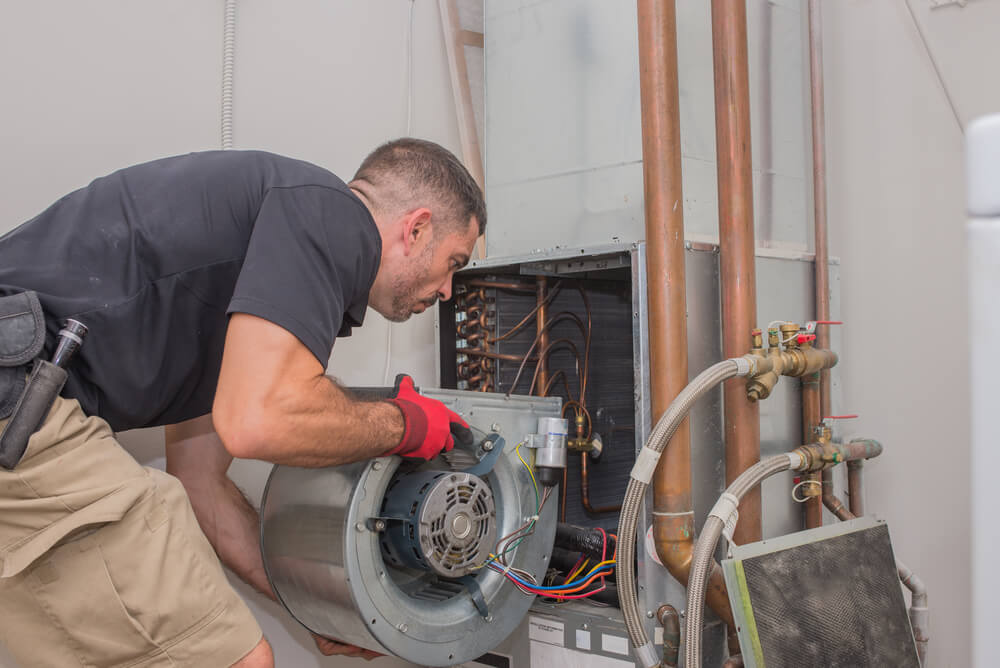
Examine the Fan Motor
The fan motor in your air conditioner is responsible for circulating air over the condenser coils and through your home. An improperly functioning fan motor can lead to poor cooling performance. Here’s how to examine it:
1. Turn Off the Power: As always, start by turning off the power to your AC unit to ensure safety during inspection.
2. Access the Fan Motor: Depending on your system, you may need to remove a protective grille or panel to access the fan motor.
3. Check for Obstructions: Inspect the fan blades for any obstructions, such as leaves, debris, or damage. Clear any blockages to ensure smooth operation.
4. Lubricate the Motor: If your fan motor has oil ports, lubricate it according to the manufacturer’s recommendations. Proper lubrication reduces friction and extends the motor’s life.
5. Listen for Unusual Noises: Turn on the AC unit and listen for any unusual noises coming from the fan motor. Unusual grinding or squealing sounds may indicate a problem.
6. Test the Motor: Test the motor’s performance by monitoring the speed and responsiveness of the fan. If it’s slow to start, doesn’t reach full speed, or operates inconsistently, the motor may need attention.
7. Replace if Necessary: If you encounter any significant issues with the fan motor, consider replacing it with a compatible and appropriately sized motor.
8. Reassemble and Power On: After any necessary maintenance or replacement, reassemble the components and turn the power back on.
A properly functioning fan motor is essential for efficient cooling. Regular inspection and maintenance can help ensure that the fan motor operates optimally.
Investigate Refrigerant Levels
Refrigerant is the lifeblood of your air
conditioning system, and having the correct refrigerant levels is vital for efficient cooling. Here’s how to investigate and address refrigerant levels:
1. Safety First: Always prioritize safety by turning off the power to your AC unit before beginning any maintenance.
2. Locate the Refrigerant Lines: The refrigerant lines connect the indoor and outdoor components of your AC system. They are typically covered with insulation.
3. Inspect for Leaks: Examine the refrigerant lines for signs of oil stains or frost accumulation, as these can indicate refrigerant leaks. If you suspect a leak, it’s essential to contact a professional technician for repairs.
4. Monitor Cooling Performance: Keep an eye on the cooling performance of your AC system. If it’s taking longer to cool your space or not maintaining the desired temperature, it could be a sign of low refrigerant levels.
5. Check the Refrigerant Pressure: A professional HVAC technician can check the refrigerant pressure with specialized gauges. Low refrigerant levels may indicate a leak or other issues within the system.
6. Schedule a Professional Inspection: If you suspect refrigerant issues or experience decreased cooling efficiency, it’s best to schedule a professional inspection. Certified technicians can diagnose and address refrigerant-related problems.
Maintaining proper refrigerant levels is essential for your AC’s cooling capacity. Regular inspections and professional servicing can help ensure that your system operates at its best.
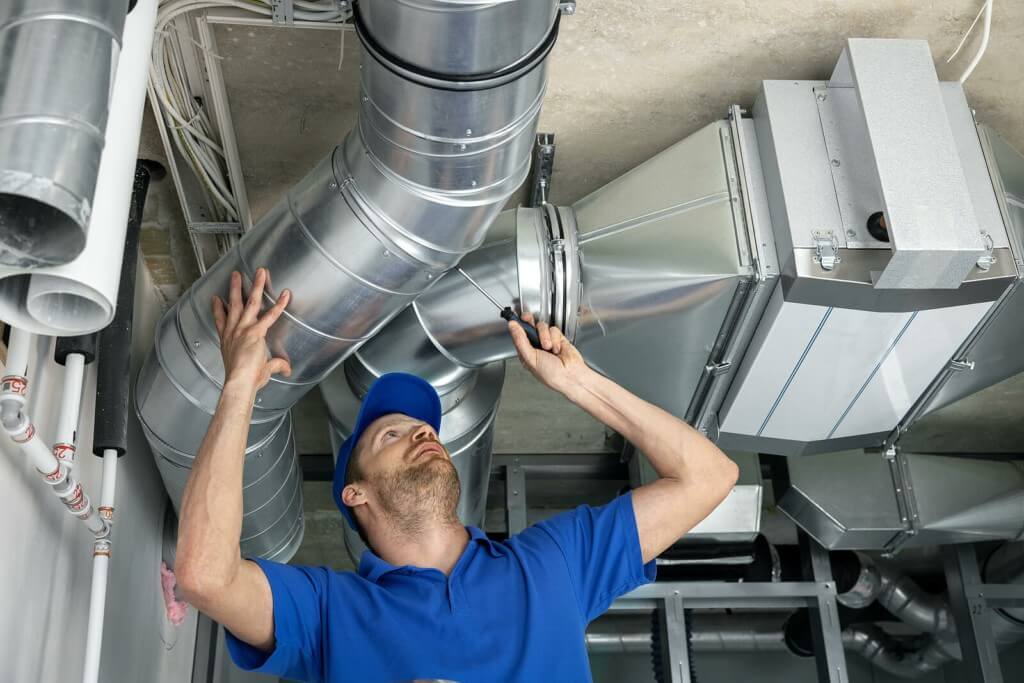
Inspect Ductwork
Your air conditioning system relies on a network of ducts to distribute cooled air throughout your home. Leaky or damaged ducts can result in uneven cooling and increased energy consumption. Here’s how to inspect and address issues with your ductwork:
1. Turn Off the Power: Begin by turning off the power to your AC system to ensure safety during inspection.
2. Access the Ducts: Depending on your system’s design, you may need to access the ducts in your attic, crawl space, or basement. Locate the areas where the ducts are accessible.
3. Inspect for Leaks: Carefully examine the ducts for any visible signs of leaks or damage. Look for disconnected joints, holes, or tears in the ductwork.
4. Seal Leaky Joints: If you identify any leaks or gaps in the duct joints, seal them with duct mastic or foil tape. Ensure a secure and airtight connection.
5. Check for Insulation: Inspect the ducts for proper insulation. If the insulation is damaged or missing, consider adding or replacing it to improve energy efficiency.
6. Monitor Airflow: Turn on your AC system and monitor airflow through the vents in each room. Uneven or weak airflow may indicate ductwork issues that need attention.
7. Schedule Professional Duct Inspection: For a thorough evaluation of your ductwork’s condition and performance, consider scheduling a professional duct inspection. Duct specialists can pinpoint hidden issues and recommend necessary repairs or improvements.
8. Reassemble and Power On: After completing any necessary repairs or improvements, reassemble the access points and turn the power back on.
Properly sealed and insulated ducts ensure efficient cooling and heating in your home. Regular duct inspections and maintenance can help you identify and address any issues promptly.
Know When to Call a Professional
While DIY maintenance can address many air conditioning issues, there are times when it’s essential to call a professional HVAC technician. Here are some signs that indicate it’s time to seek professional assistance:
- Refrigerant Issues: Low refrigerant levels or suspected leaks require professional diagnosis and repair.
- Complex Electrical Problems: Electrical issues beyond loose connections or capacitor replacement should be handled by a professional.
- Compressor or Motor Failure: If your compressor or fan motor fails, it’s best to call a technician for assessment and replacement.
- Strange Sounds or Smells: Unusual noises or odors emanating from your AC system may indicate underlying problems that need professional attention.
- Persistent Performance Issues: If your AC system continues to underperform despite DIY efforts, a technician can identify and address the root cause.
Professional technicians have the knowledge and equipment to diagnose and resolve complex air conditioning problems safely and effectively.
Conclusion
Regular maintenance and inspection of your air conditioning system are essential for keeping it running efficiently and extending its lifespan. While some tasks can be performed by homeowners, it’s crucial to know when to call a professional technician for more complex issues. By following these guidelines and staying vigilant, you can enjoy consistent and efficient cooling in your home.